How to Start a Membership Site on WordPress — Complete Guide with Paid Memberships Pro

A membership site is one of the most powerful business models available to WordPress site owners. Instead of relying on one-off transactions or advertising revenue, you charge members a recurring fee for access to exclusive content, a community, tools, or services. WordPress, combined with the right plugin, makes setting this up surprisingly accessible — even if you have no technical background.
This guide walks you through the entire process using Paid Memberships Pro (PMPro), the most widely adopted free membership plugin for WordPress, from installation through to accepting your first payment and protecting your content.
Why Create a Membership Site?
Recurring revenue: Monthly or annual subscriptions create predictable, compounding income. A site with 200 members paying $20/month generates $4,000 in revenue every month without chasing new sales. This stability is transformative for content creators, consultants, and educators.
Community building: Paid membership creates commitment. Members who pay to belong are far more engaged than passive free readers. This cultivates a loyal audience that supports your work and each other.
Exclusive content as a value proposition: Restricting your best content — in-depth tutorials, templates, live sessions, courses — to members gives you a clear reason for people to subscribe, and gives you leverage to produce more valuable work.
Scalability: Once the system is set up, adding new members costs you nothing extra in infrastructure. Your content is the product, and it scales to thousands of members on the same WordPress install.
What Is Paid Memberships Pro?
Paid Memberships Pro (PMPro) is a free, open-source WordPress plugin that has been downloaded over 5 million times and powers membership sites in virtually every niche imaginable — online courses, fitness communities, professional associations, news publications, software businesses, and more. It works with any WordPress theme and integrates with the tools you already use.
The core plugin is genuinely free — not a crippled freemium product. You can create unlimited membership levels, protect content, accept payments via Stripe or PayPal, and manage members without paying anything. PMPro’s business model relies on selling premium add-ons and support plans for sites that need advanced features like Zapier integration, affiliate programs, or email provider connections.
Requirements Before You Start
A working WordPress site: PMPro requires WordPress 5.4 or later. You should have WordPress installed and your theme configured before setting up membership functionality.
SSL certificate (HTTPS): This is not optional if you are accepting payments. Payment gateways require HTTPS for PCI compliance. Most hosting providers offer free SSL certificates via Let’s Encrypt — enable it in your hosting control panel before proceeding. Your site URL should start with
https://.A payment gateway account: Stripe is the recommended option — it is easy to set up, supports recurring subscriptions natively, and has competitive fees (typically 2.9% + $0.30 per transaction). You can sign up for a Stripe account at stripe.com before starting. PayPal is also supported if you prefer it.
An email sending setup: WordPress’s default mail function is unreliable. Install a plugin like WP Mail SMTP and connect it to a transactional email service (Mailgun, SendGrid, or Amazon SES) so membership confirmation and billing emails actually reach your members.
Step 1: Install Paid Memberships Pro
Installing PMPro takes about two minutes:
Log in to your WordPress admin dashboard (
yoursite.com/wp-admin).Navigate to Plugins → Add New in the left sidebar.
In the search box, type Paid Memberships Pro.
The plugin will appear at the top of the results. Click Install Now next to the plugin with the official PMPro branding (blue icon, by Stranger Studios).
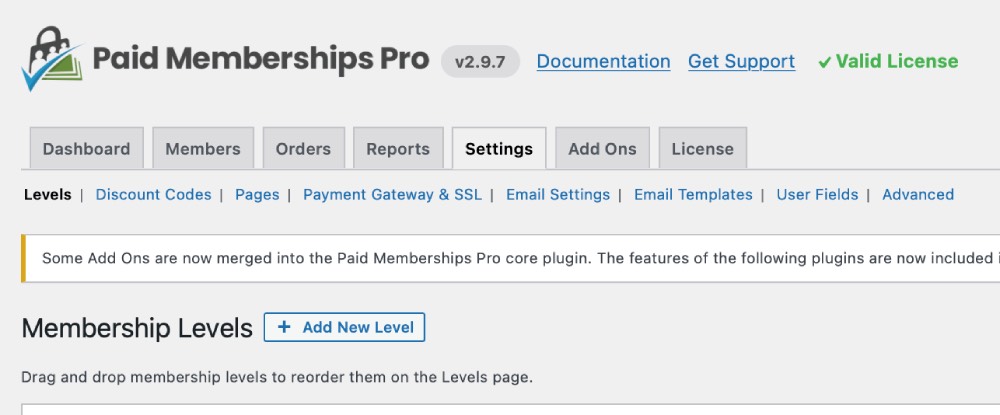
Once installed, click Activate. The plugin is now active and a new Memberships menu item will appear in your WordPress admin sidebar.
Alternatively, you can download the plugin directly from wordpress.org/plugins/paid-memberships-pro/ and upload the zip file via Plugins → Add New → Upload Plugin.
Step 2: Create Your Membership Levels
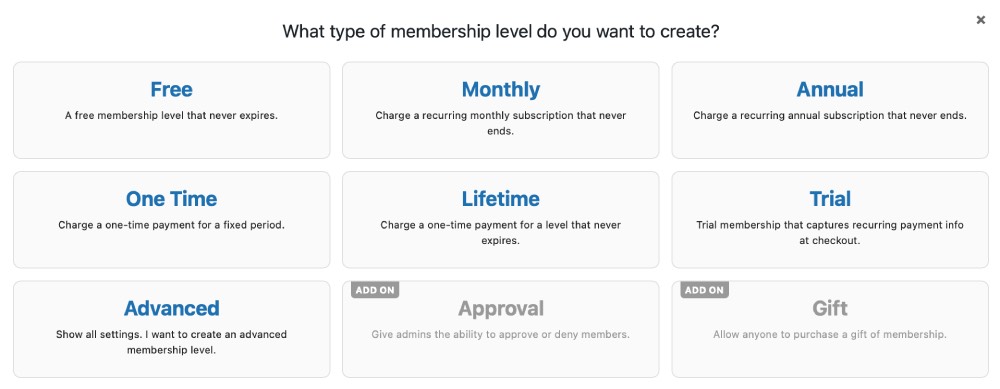
Membership levels define what visitors can sign up for — their price, billing cycle, and what content they get access to. You can have as many levels as you want: a free level, a basic paid tier, and a premium tier are a common structure.
Navigate to Memberships → Settings → Membership Levels and click Add New Level.
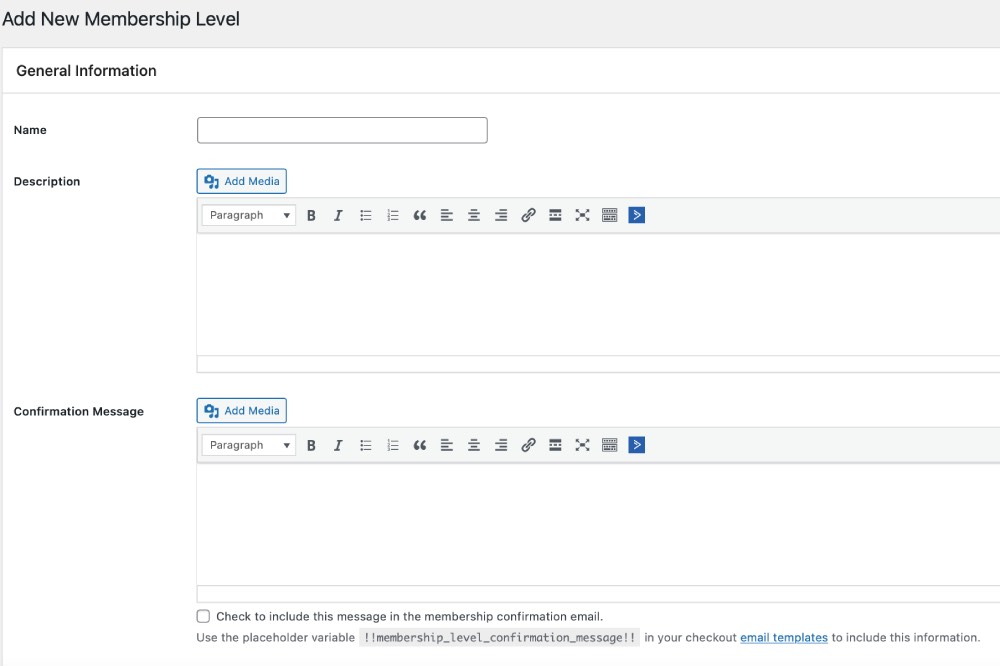
Enter a Name for the level (e.g. "Free", "Basic", or "Premium"). This is what members will see at checkout.
Write a Description that clearly lists what this membership level includes — what content they get access to, what tools or resources are available, and any limitations. A clear description reduces buyer confusion and support questions.
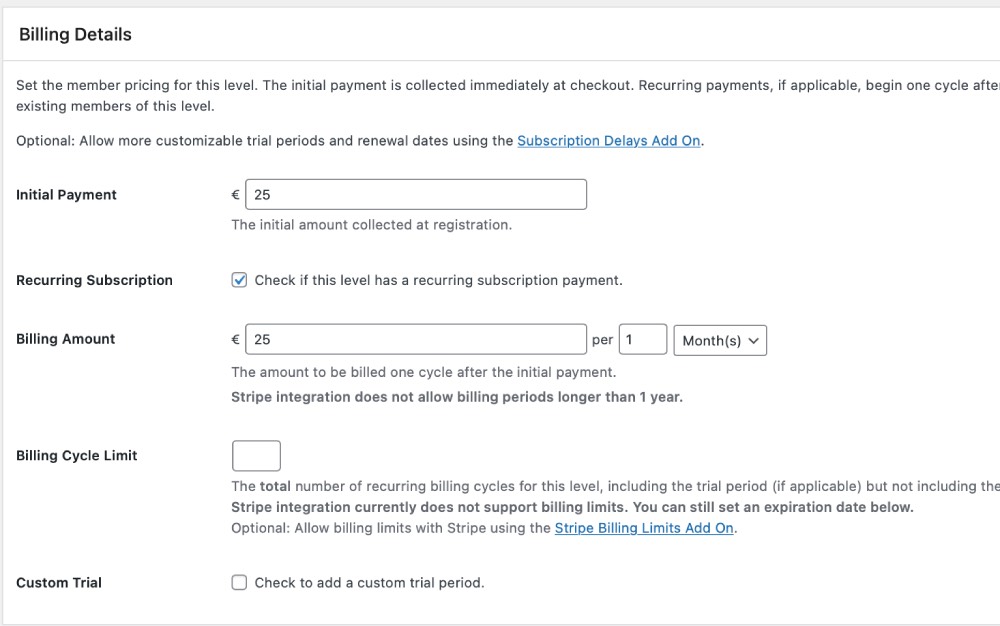
Scroll to Billing Details. Here you configure pricing:
- Initial Payment: A one-time charge at signup. Set to 0 for free trials or free membership levels.
- Recurring Subscription: Toggle this on for monthly or annual billing. Set the billing amount (e.g. $19) and billing cycle (Monthly, Annually, Weekly, or custom).
- Trial Period: Optionally offer a free or discounted trial period (e.g. 7 days free, then $19/month). This significantly improves conversion rates.
Under Content Settings, select which categories of content members at this level can access. This provides a coarse-grained access control at the category level — you can also restrict individual pages and posts later.
Click Save Level. Repeat this process for each membership tier you want to offer.
Step 3: Protect Your Content
Content protection is how you enforce membership — visitors without the right membership level see either a login prompt or a customisable excerpt with a call to sign up. PMPro gives you several ways to restrict content:
Restricting Individual Pages and Posts
Open any page or post in the WordPress editor (Gutenberg or Classic).
In the right sidebar (or below the editor in Classic mode), find the Require Membership meta box.
Select which membership levels can access this content. You can select multiple levels — for example, both "Basic" and "Premium" members can see a post, but free users cannot.
Save or update the post. Non-members visiting this URL will now see your configured "non-member message" with a link to sign up.
Restricting by Category
You can restrict all posts in an entire category to specific membership levels. Go to Memberships → Settings → Membership Levels, edit a level, and select the categories that level should have access to under Content Settings. Any post tagged with a restricted category will automatically be protected.
Step 4: Set Up Your Payment Gateway
PMPro supports multiple payment gateways out of the box:
Stripe (recommended) — supports recurring subscriptions, is available in 40+ countries, and has the best developer experience. Requires a free Stripe account.
PayPal — widely trusted by customers, especially in markets where Stripe is not available. Supports recurring billing via PayPal Subscriptions.
Authorize.net — popular in the United States for businesses that need a merchant account.
Braintree Payments — owned by PayPal; supports credit cards and PayPal in one integration.
2Checkout / Cybersource — for specific enterprise or international requirements.
Connecting Stripe (Recommended)
Navigate to Memberships → Settings → Payment Gateway and SSL.

Select Stripe from the Payment Gateway dropdown.
Set Gateway Environment to Sandbox/Testing first — this lets you run test payments without charging real cards. Switch to Live/Production only after testing.
Enter your Stripe API keys. Find these in your Stripe Dashboard under Developers → API keys:
- Publishable key: Starts with
pk_test_(test) orpk_live_(production) - Secret key: Starts with
sk_test_(test) orsk_live_(production)
- Publishable key: Starts with
Click Save Settings. PMPro will attempt to connect to Stripe — if the keys are correct, you will see a success confirmation.
To enable Stripe Webhooks (required for subscription renewals and cancellations to sync correctly), follow PMPro’s Stripe webhook setup guide — you register your site’s webhook URL in the Stripe Dashboard under Developers → Webhooks.
Step 5: Generate Your Membership Pages
PMPro requires several dedicated pages to function — a checkout page, a member account page, a login page, and a membership levels page. Rather than creating these manually, PMPro can generate them all automatically.
Navigate to Memberships → Settings → Pages.
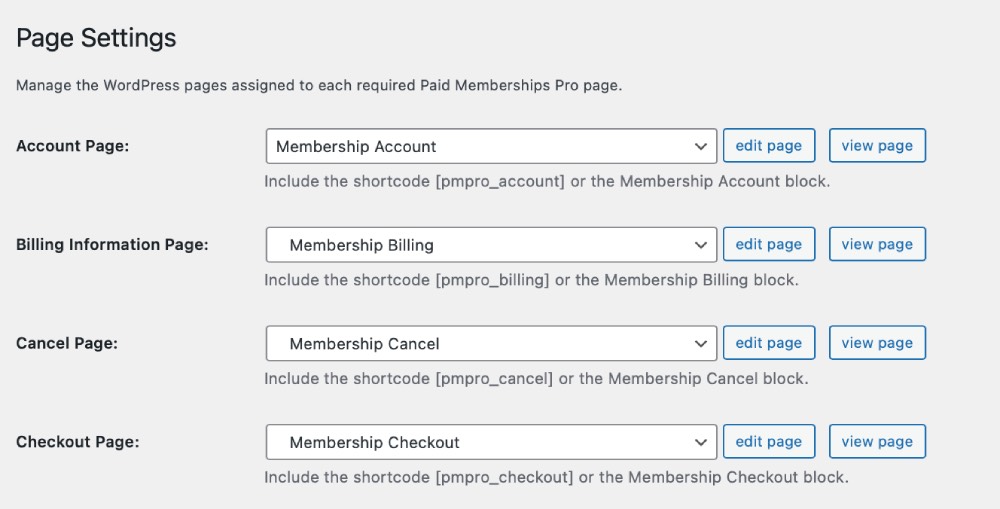
Click Generate Pages for Me. PMPro will create all the necessary pages and insert the correct shortcodes automatically.
Review each generated page. The most important ones are:
- Membership Levels page — shows visitors all available plans with pricing. This is your main sales page.
- Checkout page — where members enter payment details.
- Account page — where logged-in members manage their subscription, update payment methods, and view invoices.
- Login page — your membership-specific login form.
Customise the appearance and content of these pages to match your branding. The shortcodes PMPro inserts (like
[pmpro_levels]and[pmpro_checkout]) generate the functional elements; you can add your own copy and images around them.
Step 6: Configure Email Notifications
PMPro sends automated emails to members when they join, when subscriptions renew, when billing fails, and when they cancel. These emails are critical — they are often the first touchpoint a new member has with your site after signing up.
Navigate to Memberships → Settings → Email.
Fill in the From Email (e.g.
[email protected]) and From Name (e.g. your site name or your own name). Use a professional email address at your own domain — not a Gmail address — for better deliverability.Click Save All Settings.
PMPro sends emails at the following trigger points:
- Checkout / New member signup — a welcome email confirming their membership details
- Admin Changes — notifications when an admin manually modifies a membership
- Cancellation — confirmation that the subscription has been cancelled
- Billing Updates — notifications for failed payments or card updates
Edit the email templates to personalise the language and add links to your member resources. PMPro uses template variables like
!!name!!and!!sitename!!that are replaced with real values when the email is sent.
Step 7: Configure Advanced Settings
Navigate to Memberships → Settings → Advanced for settings that control the overall behaviour of your membership site:
Restrict Dashboard Access: Prevent regular members from accessing the WordPress admin dashboard — important for security and UX. Toggle this on and set the redirect URL to your member account page.
Non-Member Message: Customise the message shown to visitors who try to access restricted content. A good non-member message explains what they are missing and includes a clear call to action: "This content is for members only. Join today for $19/month."
Checkout Settings: Control whether checkout is a one-page or two-page process, require phone number, and other checkout UX settings.
Communication Settings: Toggle which automated emails PMPro sends. Disable any that are not relevant to your membership model.
Managing Members — View, Cancel, and Apply Discounts
Once your site is live and members are joining, you manage them from the Memberships → Members section of your WordPress admin.
View active members: The members list shows all current members with their level, join date, and subscription status. You can filter by membership level, search by name or email, and export the list as CSV.
Edit a member’s membership: Click any member to open their profile. From here you can change their membership level, set an expiration date, or cancel their membership. Changes take effect immediately.
Cancel subscriptions: When you cancel a member from the admin, PMPro cancels the recurring subscription with your payment gateway simultaneously — the member is not billed again. You can optionally set the membership to expire at the end of the paid period rather than immediately.
Apply discount codes: Go to Memberships → Discount Codes to create promo codes that offer a percentage or fixed discount on membership pricing. You can set codes to expire after a certain date or after a limited number of uses. Discount codes are a powerful conversion tool — offer a launch discount or a code for your email subscribers.
Key PMPro Add-ons Worth Considering
PMPro’s free core handles most use cases, but there are specific add-ons that significantly extend its capabilities:
PMPro Email Confirmation: Requires new members to confirm their email address before gaining access. Reduces fake signups and ensures your email list contains real addresses. Free add-on available on the PMPro website.
PMPro Zapier: Connects your membership events (new signup, cancellation, level change) to over 5,000 apps via Zapier. Common uses: add new members to a Mailchimp list, create a Slack notification on signup, or add a row to a Google Sheet for each new member.
PMPro Affiliates: Lets existing members or external affiliates earn a commission for referring new paying members. Sets up a referral link system with commission tracking built into the PMPro dashboard.
Member Homepages: Give each member their own customised homepage — useful for community sites and directories.
PMPro WooCommerce: Integrates PMPro membership levels with WooCommerce products, allowing membership status to unlock product discounts or restrict access to certain products in your store.
PMPro vs MemberPress vs Restrict Content Pro — Brief Comparison
Choosing the right plugin depends on your budget and requirements. Here is an honest comparison of the three most popular options:
Paid Memberships Pro (PMPro): Best choice for most sites starting out. The core plugin is completely free, feature-rich, and well-maintained. Add-ons are available individually or via a bundle plan. The UI is functional but less polished than MemberPress. Best for: budget-conscious site owners, developers who want flexibility, and sites that need a wide range of add-ons over time.
MemberPress: A premium-only plugin starting at around $179/year. The best-polished checkout experience and the cleanest admin UI of any membership plugin. Built-in course builder (MemberPress Courses) makes it ideal for online education. Best for: businesses that want a professional out-of-the-box experience and are willing to pay for the polish.
Restrict Content Pro (RCP): A lightweight, developer-friendly plugin with a clean codebase. Less feature-heavy than PMPro or MemberPress but very stable and easy to extend with custom code. Best for: simple membership sites that do not need dozens of add-ons, or developers who prefer a minimal plugin they can build on top of.
Common Mistakes to Avoid
Not having SSL before accepting payments: If your site does not have HTTPS enabled, Stripe and PayPal will refuse to process payments. Enable SSL at your host first, update your WordPress URL settings in Settings → General to use
https://, and only then configure PMPro.Not testing checkout before going live: Always run a complete end-to-end test using your gateway’s sandbox/test mode before switching to live payments. Use Stripe’s test card numbers (e.g.
4242 4242 4242 4242) to simulate a real purchase and verify that the member is created, the confirmation email is sent, and the content is accessible.Not setting up email infrastructure: WordPress’s built-in mail function uses PHP mail, which gets blocked or spam-filtered by nearly every email provider. Install WP Mail SMTP and connect it to a transactional email service before launching, or your welcome emails and billing notifications will silently fail to deliver.
Skipping the non-member message customisation: The default PMPro non-member message is generic. Replace it with a compelling, benefit-focused message that tells visitors exactly what they are missing and makes joining feel like an obvious decision.
Setting up only one membership tier: A single tier leaves revenue on the table. Offer at least a free or trial level (for lead generation) and a paid level. Consider adding an annual plan at a discount — annual subscribers churn at a fraction of the rate of monthly subscribers.
Monetisation Tips to Grow Your Membership
Offer a free trial level: A free membership level with access to a subset of your content lets visitors experience value before committing to a paid plan. This dramatically increases the top of your conversion funnel. Set it up as a separate membership level with restricted content access, and include a prominent call-to-action to upgrade to the paid tier.
Annual discount: Price your annual plan at 10–20% less than 12 months of monthly payments. For example, if monthly is $19, offer the annual plan at $190 (saves $38). Offer the annual option on the checkout page alongside the monthly option. Annual members stay longer, pay upfront, and reduce your payment processing fees.
Multiple tiers with clear differentiation: A "Basic" and "Premium" tier structure works when the premium tier has clearly defined, significantly more valuable benefits. Avoid creating tiers that are so similar that visitors cannot decide — they will choose neither. List the concrete deliverables at each level in a comparison table on your pricing page.
Launch with a founding member price: When you first open your membership, offer a lower "founding member" price to early adopters that is locked in forever as long as they stay subscribed. This creates urgency, rewards early believers, and builds your initial community quickly. Use PMPro’s discount codes with an expiry date to implement this.
Email your existing audience first: Before promoting your membership publicly, launch to your existing email list or social media followers. A soft launch generates your first members, surfaces any technical issues in a controlled setting, and creates social proof before wider promotion.